Getting Started
In this section, we use a simple segmentation to create a finite element mesh, a smoothed finite element mesh, and an isosurface.
Segmentation Input
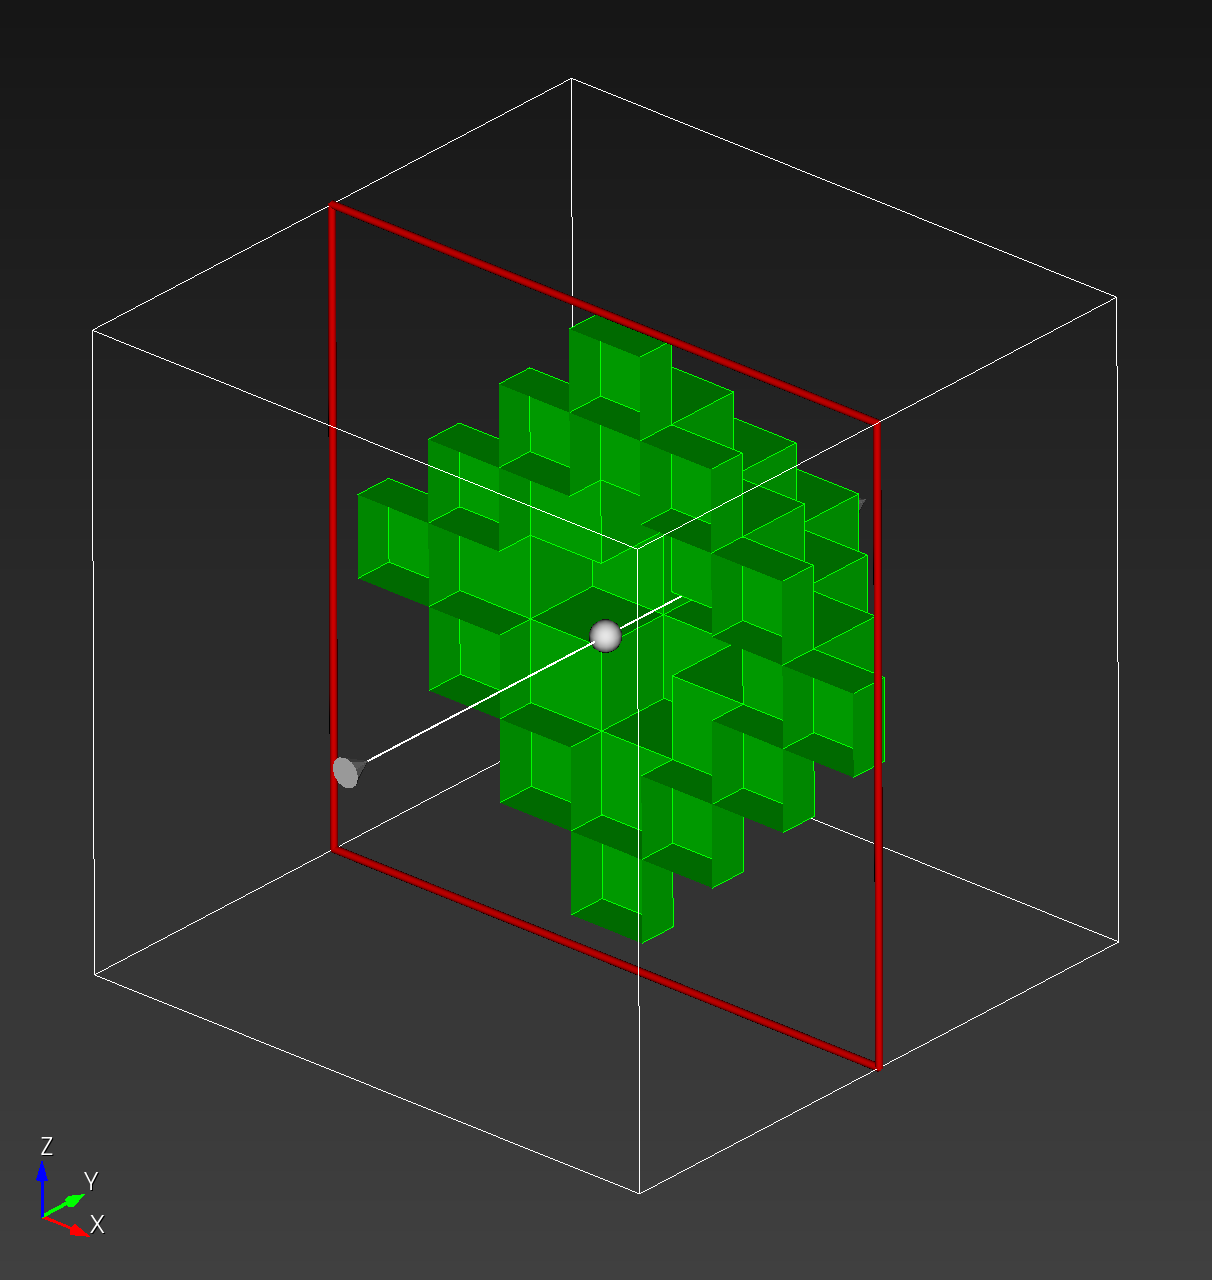
We start with a segmentation of a regular octahedron composed of three materials. The segmentation encodes
0for void (or background), shown in gray,1for the inner domain, shown in green,2for the intermediate layer, shown in yellow, and3for the outer layer, shown in magenta.
The (7 x 7 x 7) segmentation, at the midline cut plane,
appears as follows:
Consider each slice, 1 to 7, in succession:
Remark: The (
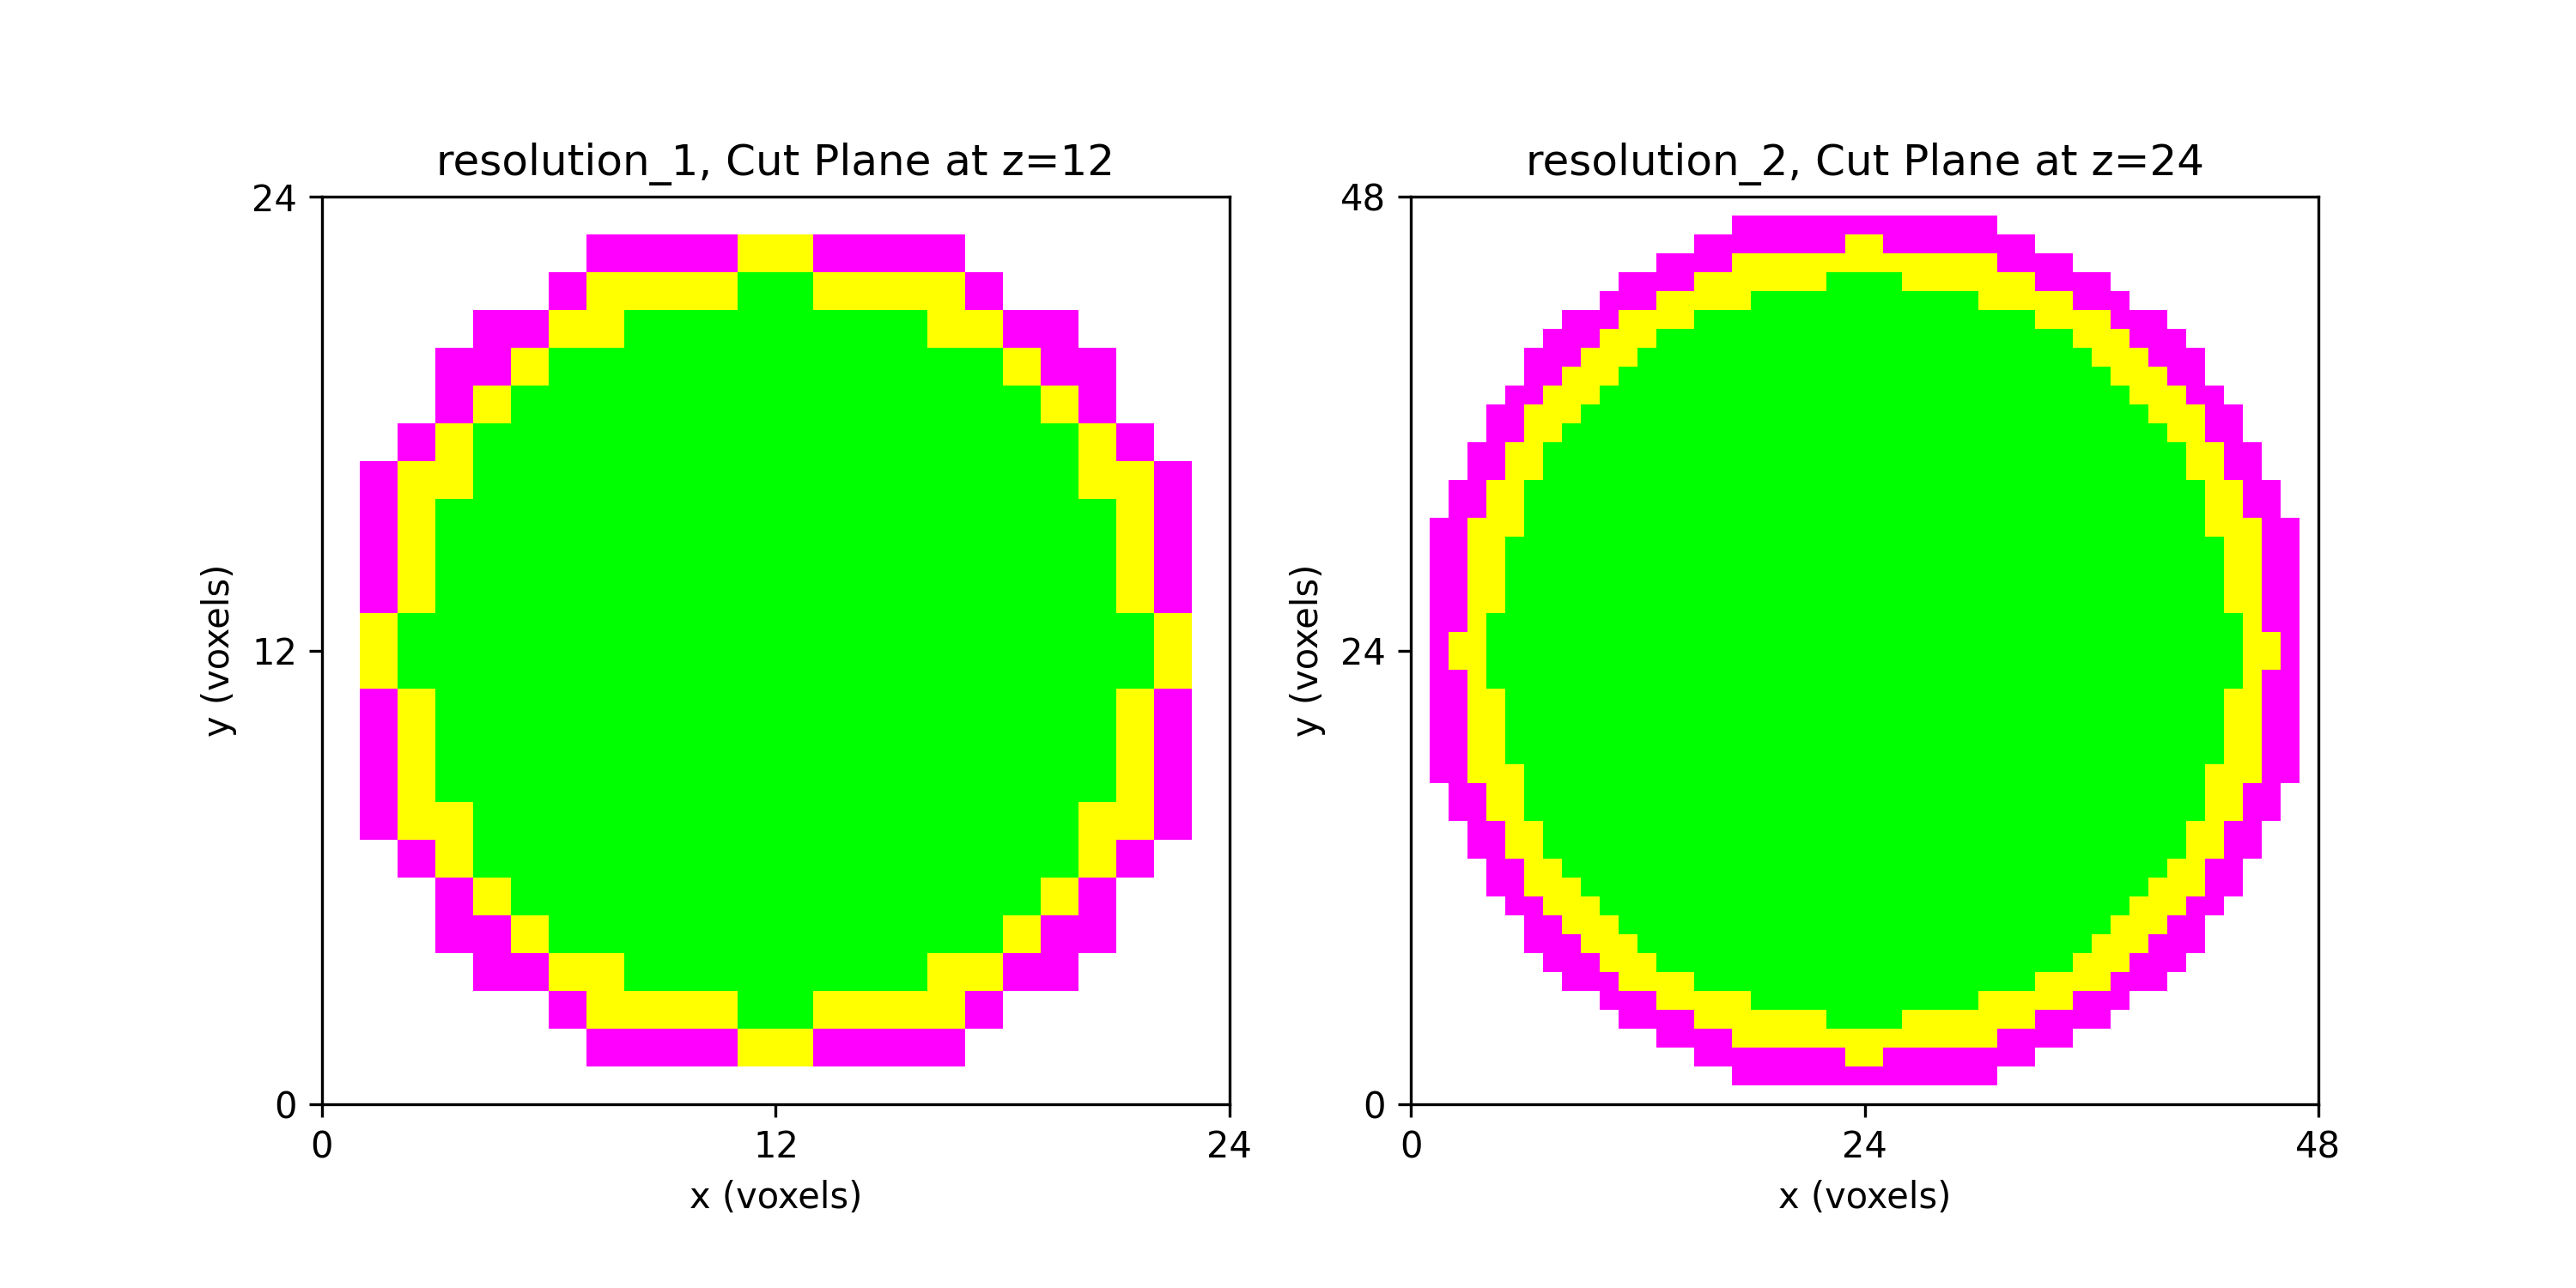
7 x 7 x 7) segmentation can be thought of as a conceptual start point for a process called Loop subdivision, used to produce spherical shapes at higher resolutions. See Octa Loop for additional information. A sphere in resolutions of (24 x 24 x 24) and (48 x 48 x 48), used in the Sphere with Shells section, is shown below:
Segmentation File Types
Two types of segmentation files types are supported: .spn and .npy.
The .spn file can be thought of as the most elementary segmentation file type because it is
saved as an ASCII text file and is therefore readily human-readable.
Below is an abbreviated and commented .spn segmentation of the (7 x 7 x 7) octahedron
discussed above.
0 # slice 1, row 1
0
0
0
0
0
0
0 # slice 1, row 2
0
0
0
0
0
0
0 # slice 1, row 3
0
0
0
0
0
0
0 # slice 1, row 4
0
0
3
0
0
0
0 # slice 1, row 5
0
0
0
0
0
0
0 # slice 1, row 6
0
0
0
0
0
0
0 # slice 1, row 7
0
0
0
0
0
0
# ... and so on for the remaining six slices
A disadvantage of .spn is that it can become difficult to keep track of data
slice-by-slice. Because it is not a compressed binary file, the .spn has a
larger file size than the equivalent .npy.
The .npy segmentation file format is an alternative to the .spn
format. The .npy format can be advantageous because is can be generated easily
from Python. This approach can be useful because Python can be used to
algorithmically create a segmentation and serialized the segmentation to a compressed
binary file in .npy format.
We illustrate creating the octahedron segmentation in Python:
"""This module creates a 7x7x7 octahedron segmentation."""

import numpy as np

segmentation = np.array(
    [
        [  # slice 1
            [0, 0, 0, 0, 0, 0, 0],  # row 1
            [0, 0, 0, 0, 0, 0, 0],  # row 2
            [0, 0, 0, 0, 0, 0, 0],  # row 3
            [0, 0, 0, 3, 0, 0, 0],  # row 4
            [0, 0, 0, 0, 0, 0, 0],  # row 5
            [0, 0, 0, 0, 0, 0, 0],  # row 6
            [0, 0, 0, 0, 0, 0, 0],  # row 7
        ],
        [  # slice 2
            [0, 0, 0, 0, 0, 0, 0],  # row 1
            [0, 0, 0, 0, 0, 0, 0],  # row 2
            [0, 0, 0, 3, 0, 0, 0],  # row 3
            [0, 0, 3, 2, 3, 0, 0],  # row 4
            [0, 0, 0, 3, 0, 0, 0],  # row 5
            [0, 0, 0, 0, 0, 0, 0],  # row 6
            [0, 0, 0, 0, 0, 0, 0],  # row 7
        ],
        [  # slice 3
            [0, 0, 0, 0, 0, 0, 0],  # row 1
            [0, 0, 0, 3, 0, 0, 0],  # row 2
            [0, 0, 3, 2, 3, 0, 0],  # row 3
            [0, 3, 2, 1, 2, 3, 0],  # row 4
            [0, 0, 3, 2, 3, 0, 0],  # row 5
            [0, 0, 0, 3, 0, 0, 0],  # row 6
            [0, 0, 0, 0, 0, 0, 0],  # row 7
        ],
        [  # slice 4
            [0, 0, 0, 3, 0, 0, 0],  # row 1
            [0, 0, 3, 2, 3, 0, 0],  # row 2
            [0, 3, 2, 1, 2, 3, 0],  # row 3
            [3, 2, 1, 1, 1, 2, 3],  # row 4
            [0, 3, 2, 1, 2, 3, 0],  # row 5
            [0, 0, 3, 2, 3, 0, 0],  # row 6
            [0, 0, 0, 3, 0, 0, 0],  # row 7
        ],
        [  # slice 5
            [0, 0, 0, 0, 0, 0, 0],  # row 1
            [0, 0, 0, 3, 0, 0, 0],  # row 2
            [0, 0, 3, 2, 3, 0, 0],  # row 3
            [0, 3, 2, 1, 2, 3, 0],  # row 4
            [0, 0, 3, 2, 3, 0, 0],  # row 5
            [0, 0, 0, 3, 0, 0, 0],  # row 6
            [0, 0, 0, 0, 0, 0, 0],  # row 7
        ],
        [  # slice 6
            [0, 0, 0, 0, 0, 0, 0],  # row 1
            [0, 0, 0, 0, 0, 0, 0],  # row 2
            [0, 0, 0, 3, 0, 0, 0],  # row 3
            [0, 0, 3, 2, 3, 0, 0],  # row 4
            [0, 0, 0, 3, 0, 0, 0],  # row 5
            [0, 0, 0, 0, 0, 0, 0],  # row 6
            [0, 0, 0, 0, 0, 0, 0],  # row 7
        ],
        [  # slice 7
            [0, 0, 0, 0, 0, 0, 0],  # row 1
            [0, 0, 0, 0, 0, 0, 0],  # row 2
            [0, 0, 0, 0, 0, 0, 0],  # row 3
            [0, 0, 0, 3, 0, 0, 0],  # row 4
            [0, 0, 0, 0, 0, 0, 0],  # row 5
            [0, 0, 0, 0, 0, 0, 0],  # row 6
            [0, 0, 0, 0, 0, 0, 0],  # row 7
        ],
    ],
    dtype=np.uint8,
)

FILE_NAME = "octahedron.npy"
np.save(FILE_NAME, segmentation)
print(f"Saved {FILE_NAME} with shape {segmentation.shape}.")
The convert Command
automesh allows for interoperability between .spn. and .npy file types.
Use the automesh help to discover the command syntax:
automesh convert --help
Converts between mesh or segmentation file types

Usage: automesh convert [OPTIONS] <COMMAND>

Commands:
  mesh          Converts mesh file types (exo | inp | stl | vtu) -> (exo | inp | mesh | stl | vtu)
  segmentation  Converts segmentation file types (npy | spn) -> (npy | spn | vti)
  help          Print this message or the help of the given subcommand(s)

Options:
      --log <FILE>  Mirror terminal output to a log file
  -q, --quiet       Pass to quiet the terminal output
  -h, --help        Print help
For example, to convert the octahedron.npy to octahedron2.spn:
automesh convert segmentation -i octahedron.npy -o octahedron2.spn
    automesh 0.4.2
     Reading octahedron.npy
       Total 214.575µs
To convert from octahedron2.spn to octahedron3.npy:
automesh convert segmentation -i octahedron2.spn -x 7 -y 7 -z 7 -o octahedron3.npy
    automesh 0.4.2
     Reading octahedron2.spn
       Total 198.179µs
Remark: Notice that the
.spnrequires number of voxels in each of the x, y, and z dimensions to be specified using--nelx,--nely,--nelz(or, equivalently-x,-y,-z) flags.
We can verify the two .npy files encode the same segmentation:
"""The purpose of this module is to show that the
segmentation data encoded in two .npy files is the same.
"""

import numpy as np

aa = np.load("octahedron.npy")
print(aa)

bb = np.load("octahedron3.npy")
print(bb)

comparison = aa == bb
print(comparison)
result = np.all(comparison)
print(f"Element-by-element equality is {result}.")
Mesh Generation
automesh creates several finite element mesh file types from
a segmentation.
Use the automesh help to discover the command syntax:
automesh mesh --help
Creates a finite element mesh from a segmentation

Usage: automesh mesh [OPTIONS] <COMMAND>

Commands:
  hex   Creates an all-hexahedral mesh from a segmentation or tessellation
  tri   Creates all-triangular isosurface(s) from a segmentation
  help  Print this message or the help of the given subcommand(s)

Options:
      --log <FILE>  Mirror terminal output to a log file
  -q, --quiet       Pass to quiet the terminal output
  -h, --help        Print help
To convert the octahedron.npy into an ABAQUS finite element mesh, while removing
segmentation 0 from the mesh:
automesh mesh hex -r 0 -i octahedron.npy -o octahedron.inp
    automesh 0.4.2
     Reading octahedron.npy
       Total 239.152µs
Smoothing
Use the automesh help to discover the command syntax:
automesh smooth --help
Applies smoothing to an existing mesh

Usage: automesh smooth [OPTIONS] --input <FILE> --output <FILE> [COMMAND]

Commands:
  remesh  Applies remeshing to the mesh before output [default mode: uniform]
  help    Print this message or the help of the given subcommand(s)

Options:
  -i, --input <FILE>      Mesh input file (exo | inp | stl | vtu)
  -o, --output <FILE>     Smoothed mesh output file (exo | inp | mesh | stl | vtu)
  -n, --iterations <NUM>  Number of smoothing iterations [default: 20]
  -m, --method <NAME>     Smoothing method (Laplace | Taubin) [default: Taubin]
  -k, --pass-band <FREQ>  Pass-band frequency (for Taubin only) [default: 0.1]
  -s, --scale <SCALE>     Scaling parameter for all smoothing methods [default: 0.6307]
  -b, --hierarchical      Enables hierarchical smoothing
      --metrics <FILE>    Quality metrics output file (csv | npy)
      --log <FILE>        Mirror terminal output to a log file
  -q, --quiet             Pass to quiet the terminal output
  -h, --help              Print help
To smooth the octahedron.inp mesh with Taubin smoothing parameters for five
iterations:
automesh smooth hex -n 5 -i octahedron.inp -o octahedron_s05.inp
The original voxel mesh and the smoothed voxel mesh are shown below:
octahedron.inp | octahedron_s05.inp |
|---|---|
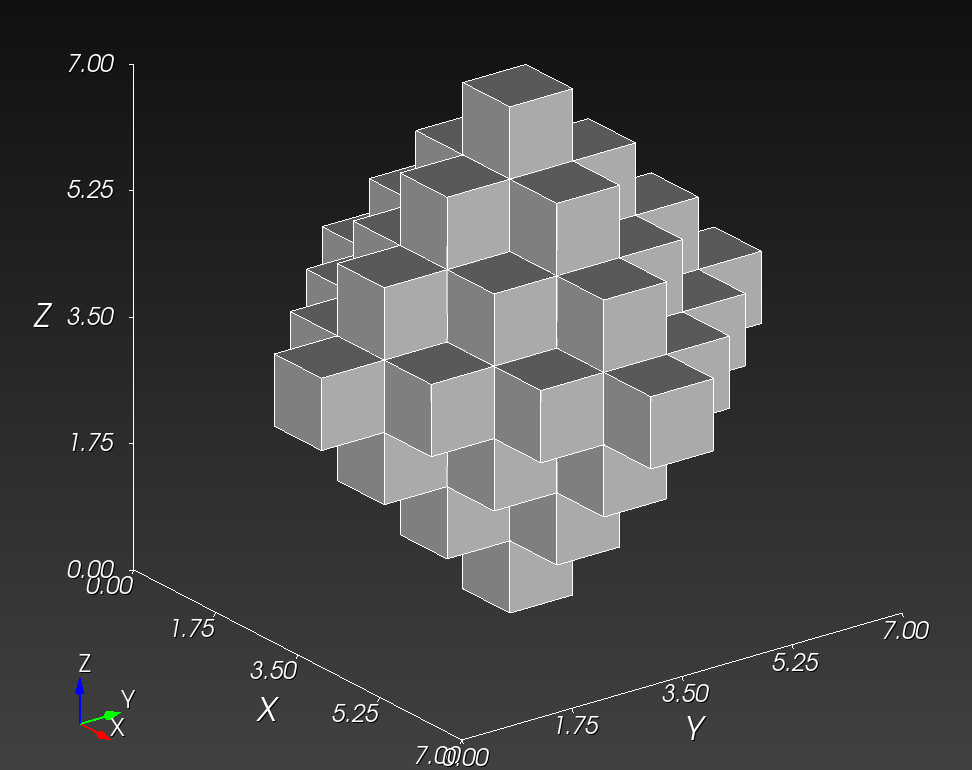 | 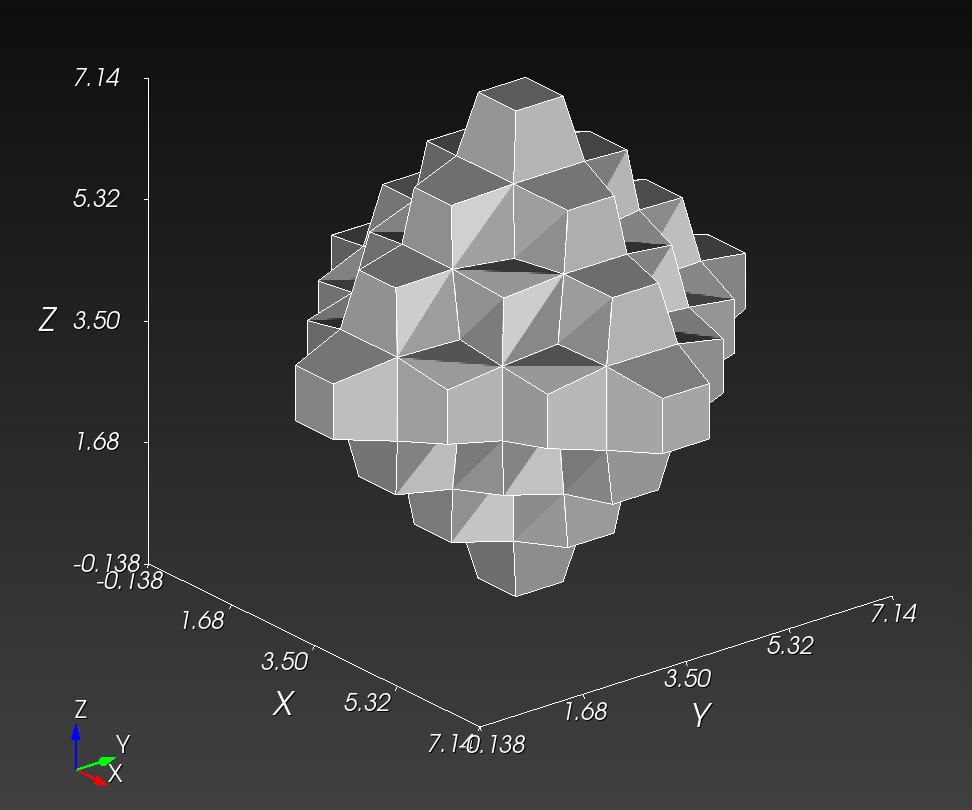 |
See the Smoothing section for more information.
Isosurface
An isosurface can be generated from a segmentation using the tri command.
To create a mesh of the outer isosurfaces contained in the octahedron example:
automesh mesh tri -r 0 1 2 -i octahedron.npy -o octahedron.stl
    automesh 0.4.2
     Reading octahedron.npy
       Total 230.809µs
The surfaces are visualized below:
octahedron.stl in MeshLab | octahedron.stl in Cubit with cut plane |
|---|---|
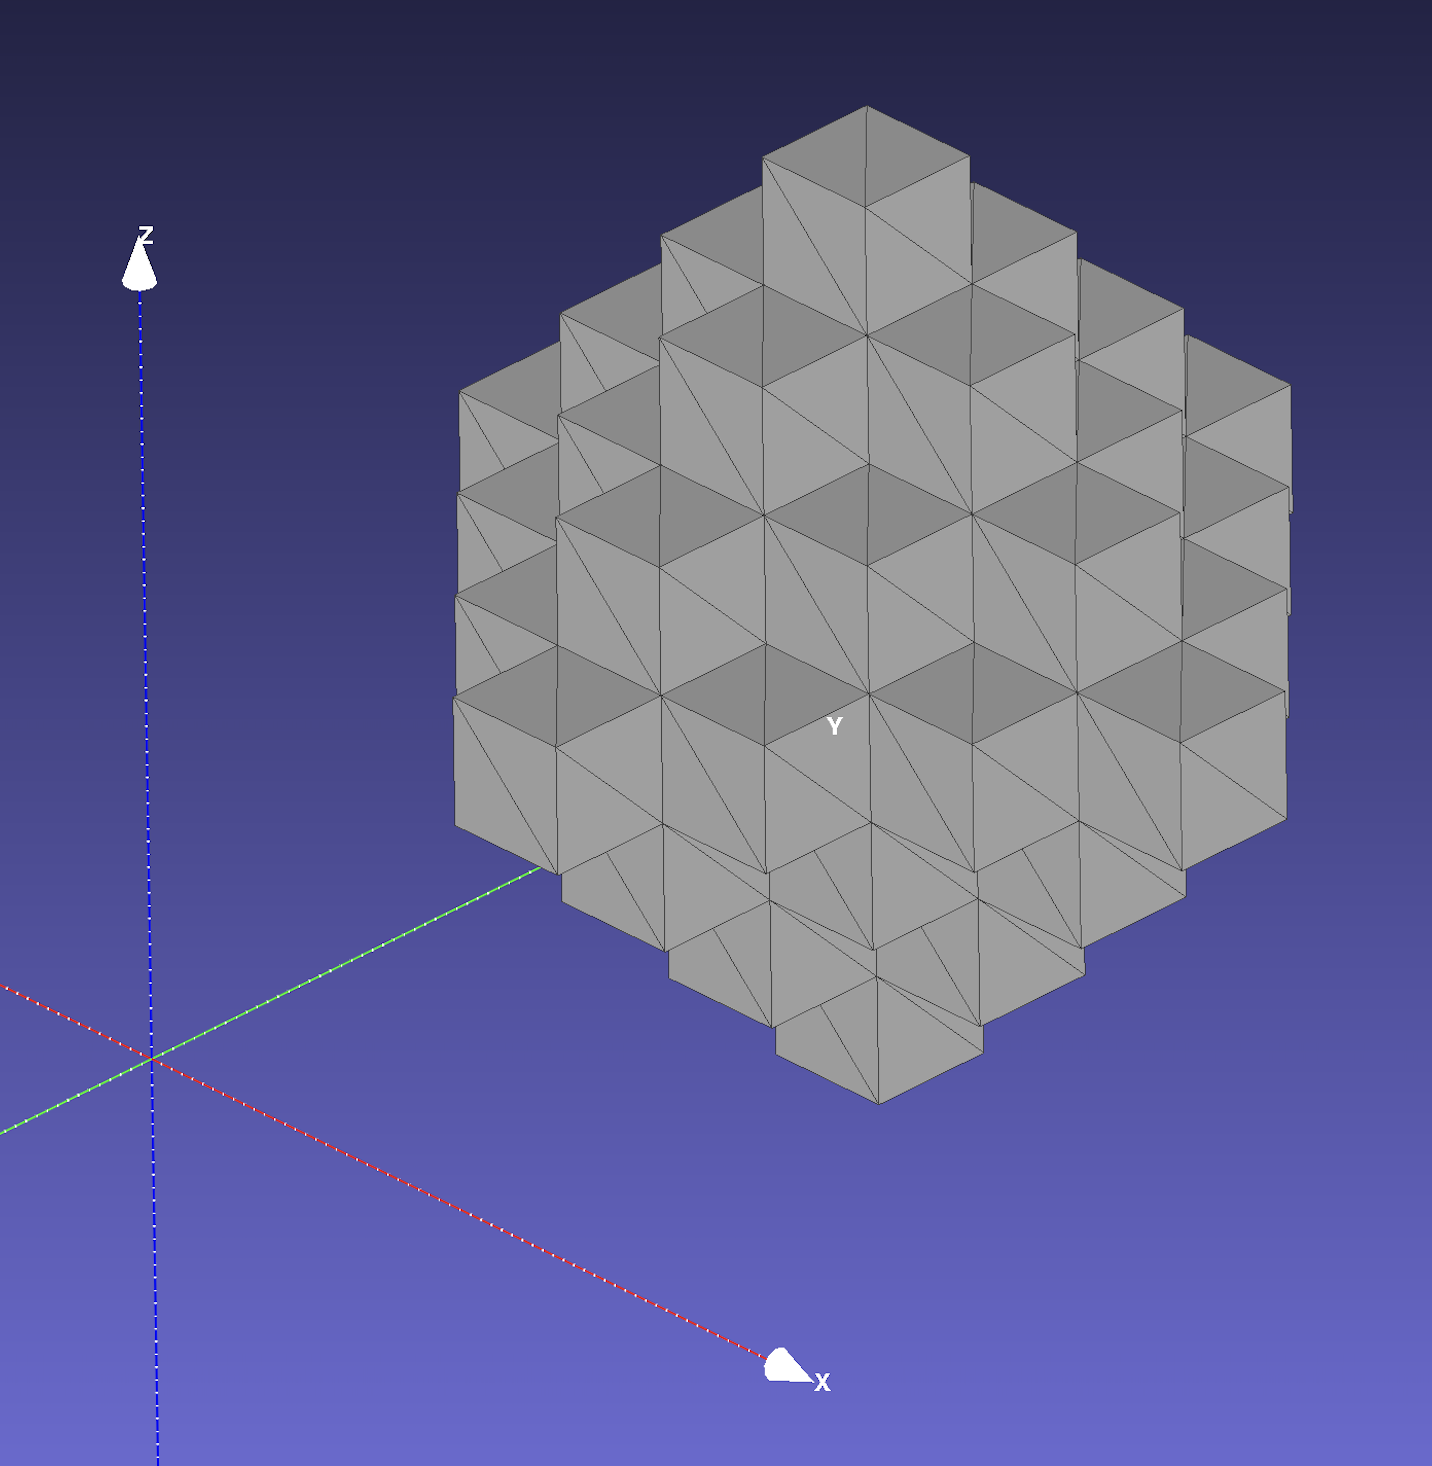 |  |
automesh creates an isosurface from the boundary faces of voxels. The
quadrilateral faces are divided into two triangles. The Isosurface section contains more details about alternative methods used to create an isosurface.
The Sphere with Shells section contains more examples of the command line interface.