Spheres - Continued
Use the fundamentals learned in the previous example to create a more sophisticated example: Concentric, high-resolution spheres consisting of three materials.
Problem Statement
Given
Given three concentric spheres of radius 10, 11, and 12 cm, as shown in the figure below,
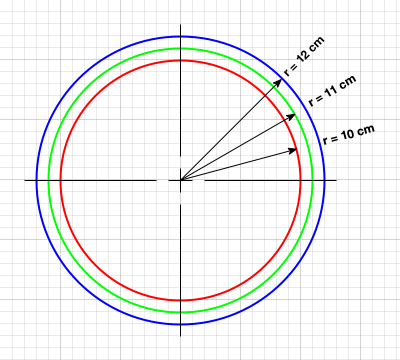
Figure: Schematic cross-section of three concentric spheres of radius 10, 11, and 12 cm. Grid spacing is 1 cm.
Find
Use the following segmentation resolutions,
| resolution (vox/cm) | element side length (cm) | nelx | # voxels |
|---|---|---|---|
| 1 | 1.0 | 24 | 13,824 |
| 2 | 0.5 | 48 | 110,592 |
| 4 | 0.25 | 96 | 884,736 |
| 10 | 0.1 | 240 | 13,824,000 |
with a cubic domain (nelx = nely = nelz),
to create finite element meshes.
Solution
Python Segmentation
Use spheres_cont.py to create segmentations,
"""This module builds on the `spheres.py` module to create high resolution,
three-material, concentric spheres and export the voxelization as a .npy
file.

Example
-------
source ~/autotwin/automesh/.venv/bin/activate
cd ~/autotwin/automesh/book/examples/spheres_cont
python spheres_cont.py

Output
------
Saved: ~/autotwin/automesh/book/examples/spheres_cont/spheres_resolution_1.npy
Saved: ~/autotwin/automesh/book/examples/spheres_cont/spheres_resolution_2.npy
Saved: ~/autotwin/automesh/book/examples/spheres_cont/spheres_resolution_3.npy
Saved: ~/autotwin/automesh/book/examples/spheres_cont/spheres_resolution_4.npy
"""

from pathlib import Path
from typing import Final

from matplotlib.colors import LightSource
import matplotlib.pyplot as plt
from mpl_toolkits.mplot3d import Axes3D
import numpy as np


def sphere(resolution: int, dtype=np.uint8) -> np.ndarray:
    """Generate a 3D voxelized representation of three concentric spheres
        of 10, 11, and 12 cm, at a given resolution.

        Parameters
        ----------
        resolution : int
            The resolution as voxels per centimeter.  Minimum value is 1.

        dtype: data-type, optional
            The data type of the output array.  Default is np.uint8.

        Returns
        -------
        np.ndarray
            A 3D numpy array representing the voxelized spheres.  Voxels within
            the inner sphere are set to 1, the intermediate shell are set to 2,
            and the outer shell are set to 3.  Voxels outside the spheres are
            set to 0.

        Raises
        ------
        ValueError
            If the resolution is less than 1.
    """
    print(f"Creating sphere with resolution: {resolution}")
    if resolution < 1:
        raise ValueError("Resolution must be >= 1")

    r10 = 10  # cm
    r11 = 11  # cm
    r12 = 12  # cm

    # We change the algorithm a bit here so we can exactly match the radius:
    # number of voxels per side length (nvps)
    # nvps = 2 * r12 * resolution + 1
    nvps = 2 * r12 * resolution
    vox_z, vox_y, vox_x = np.mgrid[
        -r12: r12: nvps * 1j,
        -r12: r12: nvps * 1j,
        -r12: r12: nvps * 1j,
    ]
    domain = vox_x**2 + vox_y**2 + vox_z**2
    mask_10_in = np.array(domain <= r10 * r10, dtype=dtype)
    mask_11_in = np.array(domain <= r11 * r11, dtype=dtype)
    mask_12_in = np.array(domain <= r12 * r12, dtype=dtype)

    mask_10_11 = mask_11_in - mask_10_in
    mask_11_12 = mask_12_in - mask_11_in

    shell_10_11 = 2 * mask_10_11
    shell_11_12 = 3 * mask_11_12

    result = mask_10_in + shell_10_11 + shell_11_12
    # breakpoint()
    print(f"Completed: Sphere with resolution: {resolution}")
    return result


rr = (1, 2, 4, 10)  # resolutions (voxels per cm)
lims = tuple(map(lambda x: [0, 24*x], rr))  # limits
tt = tuple(map(lambda x: [0, 12*x, 24*x], rr))  # ticks

# User input begin
spheres = {
    "resolution_1": sphere(resolution=rr[0]),
    "resolution_2": sphere(resolution=rr[1]),
    "resolution_3": sphere(resolution=rr[2]),
    "resolution_4": sphere(resolution=rr[3]),
}

aa = Path(__file__)
bb = aa.with_suffix(".png")

# Visualize the elements.
# width, height = 8, 4
width, height = 6, 3
fig = plt.figure(figsize=(width, height))
# fig = plt.figure(figsize=(8, 8))

el, az, roll = 63, -110, 0
cmap = plt.get_cmap(name="tab10")
num_colors = len(spheres)
voxel_alpha: Final[float] = 0.9

colors = cmap(np.linspace(0, 1, num_colors))
lightsource = LightSource(azdeg=325, altdeg=45)  # azimuth, elevation
# lightsource = LightSource(azdeg=325, altdeg=90)  # azimuth, elevation
dpi: Final[int] = 300  # resolution, dots per inch
visualize: Final[bool] = False  # turn to True to show the figure on screen
serialize: Final[bool] = True  # turn to True to save .png and .npy files
# User input end

N_SUBPLOTS = len(spheres)
for index, (key, value) in enumerate(spheres.items()):
    if visualize:
        print(f"index: {index}")
        print(f"key: {key}")
        print(f"value: {value}")
        ax = fig.add_subplot(1, N_SUBPLOTS, index+1, projection=Axes3D.name)
        ax.voxels(
            value,
            facecolors=colors[index],
            edgecolor=colors[index],
            alpha=voxel_alpha,
            lightsource=lightsource)
        ax.set_title(key)

        # Set labels for the axes
        ax.set_xlabel("x (voxels)")
        ax.set_ylabel("y (voxels)")
        ax.set_zlabel("z (voxels)")

        ax.set_xticks(ticks=tt[index])
        ax.set_yticks(ticks=tt[index])
        ax.set_zticks(ticks=tt[index])

        ax.set_xlim(lims[index])
        ax.set_ylim(lims[index])
        ax.set_zlim(lims[index])

        # Set the camera view
        ax.set_aspect("equal")
        ax.view_init(elev=el, azim=az, roll=roll)

    if serialize:
        cc = aa.with_stem("spheres_" + key)
        dd = cc.with_suffix(".npy")
        # Save the data in .npy format
        np.save(dd, value)
        print(f"Saved: {dd}")

# fig.tight_layout()  # don't use as it clips the x-axis label
if visualize:
    plt.show()

    if serialize:
        fig.savefig(bb, dpi=dpi)
        print(f"Saved: {bb}")
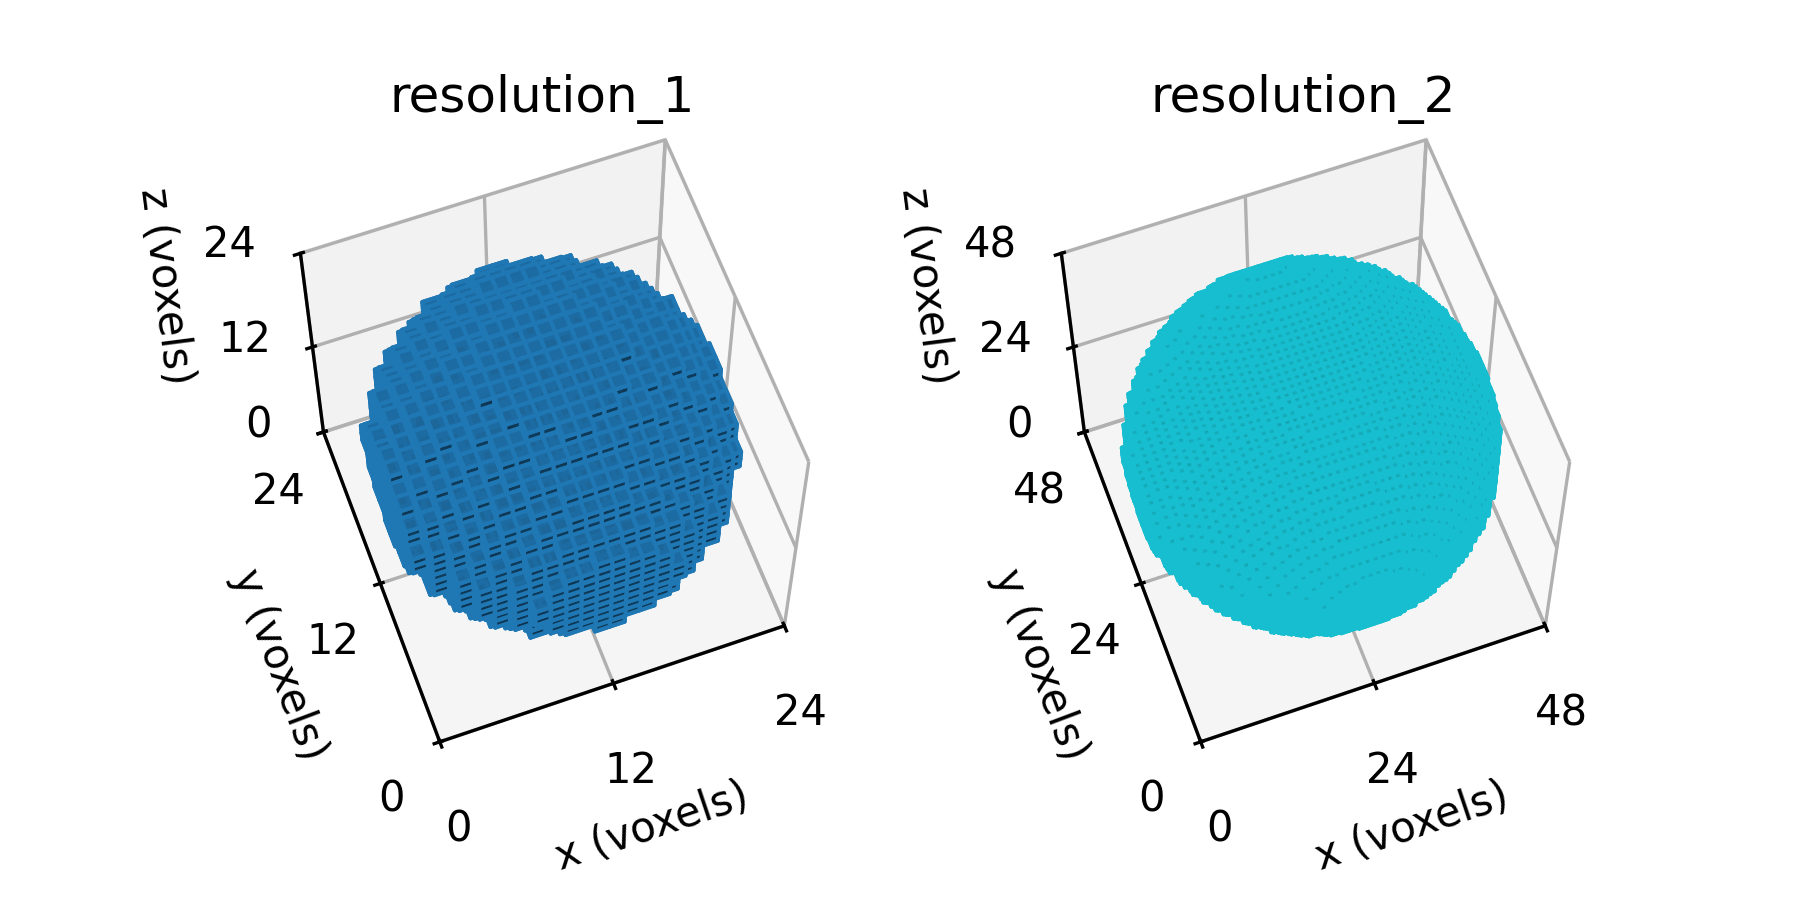
Figure: Sphere segmentations at selected resolutions, shown in the voxel domain. Because plotting large domains with Matplotlib is slow, only the first two resolutions are shown.
automesh
Use automesh to convert the segmentations into finite element meshes.
alias automesh='/Users/chovey/autotwin/automesh/target/release/automesh'
cd ~/autotwin/automesh/book/examples/spheres_cont/
automesh mesh -i spheres_resolution_1.npy \
-o spheres_resolution_1.inp \
-x 24 -y 24 -z 24 \
--xtranslate -12 --ytranslate -12 --ztranslate -12
automesh mesh -i spheres_resolution_2.npy \
-o spheres_resolution_2.inp \
-x 48 -y 48 -z 48 \
--xscale 0.5 --yscale 0.5 --yzscale 0.5 \
--xtranslate -12 --ytranslate -12 --ztranslate -12
automesh mesh -i spheres_resolution_3.npy \
-o spheres_resolution_3.inp \
-x 96 -y 96 -z 96 \
--xscale 0.25 --yscale 0.25 --zscale 0.25 \
--xtranslate -12 --ytranslate -12 --ztranslate -12
automesh mesh -i spheres_resolution_4.npy \
-o spheres_resolution_4.inp \
-x 240 -y 240 -z 240 \
--xscale 0.1 --yscale 0.1 --yzscale 0.1 \
--xtranslate -12 --ytranslate -12 --ztranslate -12
| resolution | 1 vox/cm | 2 vox/cm | 4 vox/cm | 10 vox/cm |
|---|---|---|---|---|
| midline | 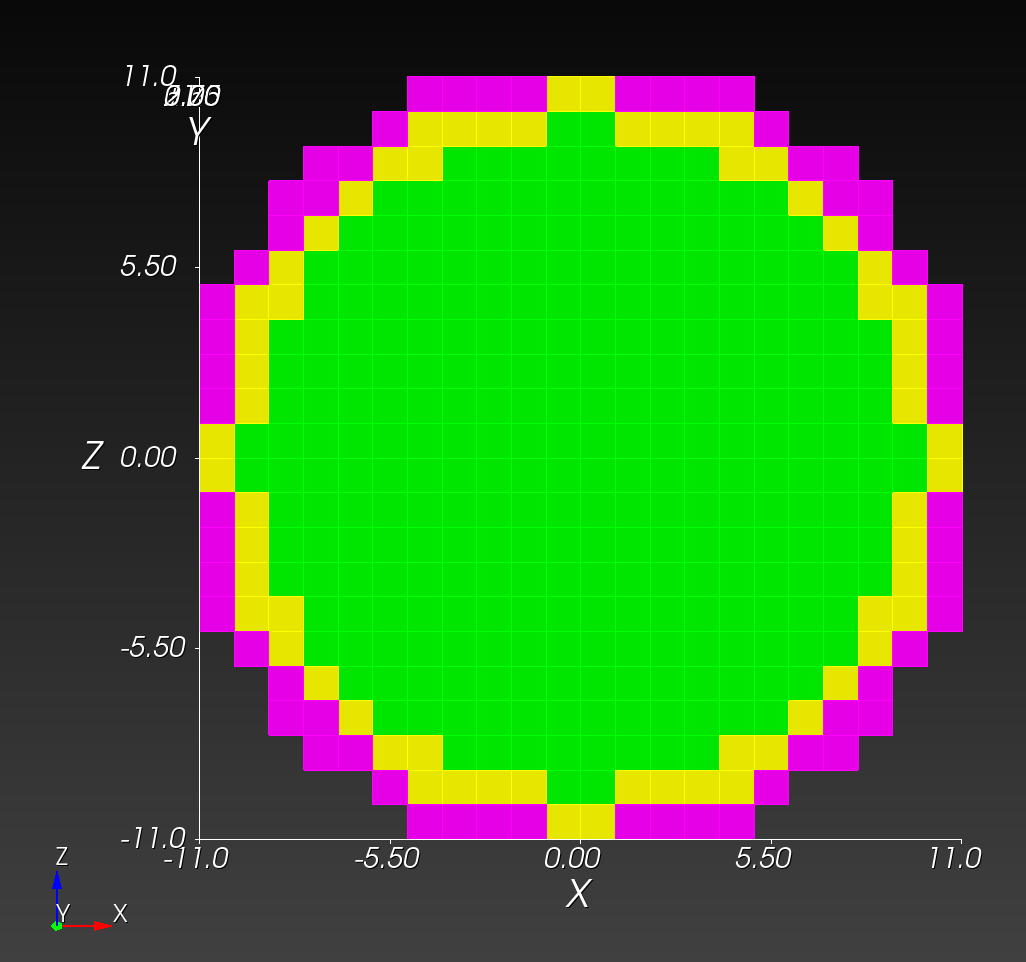 | 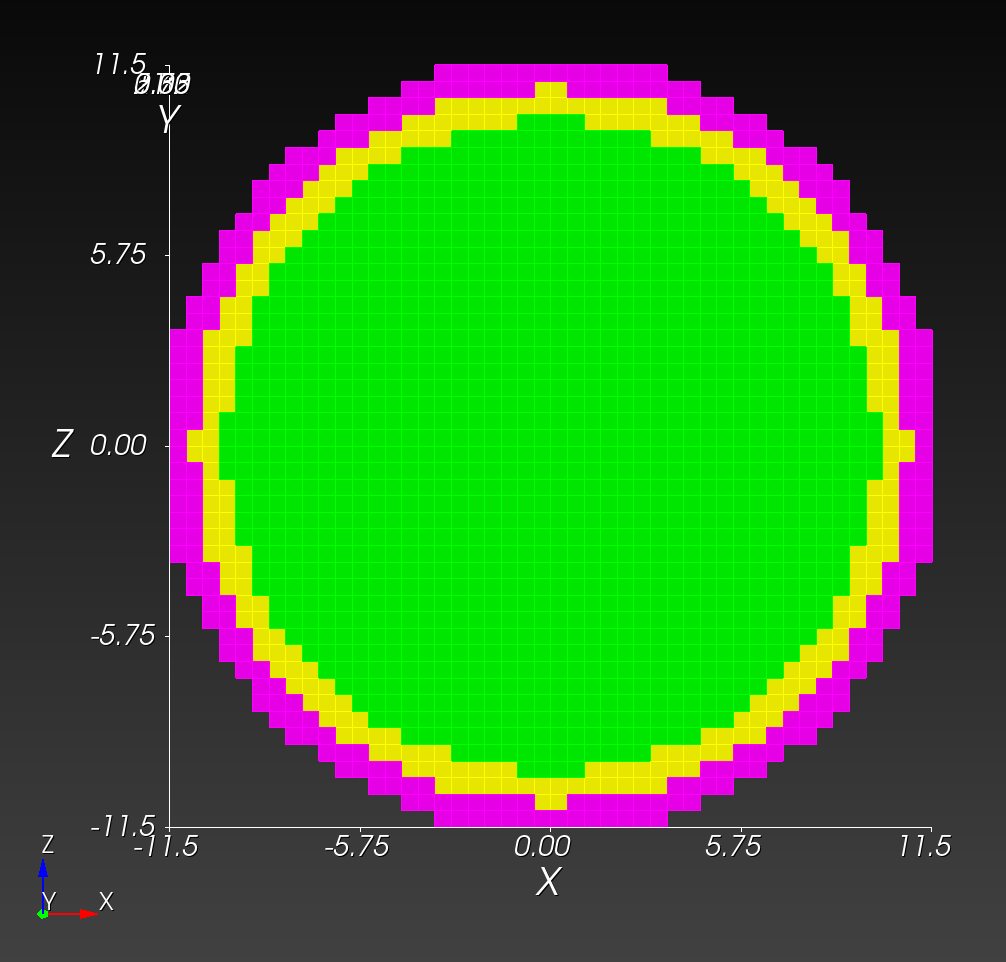 | 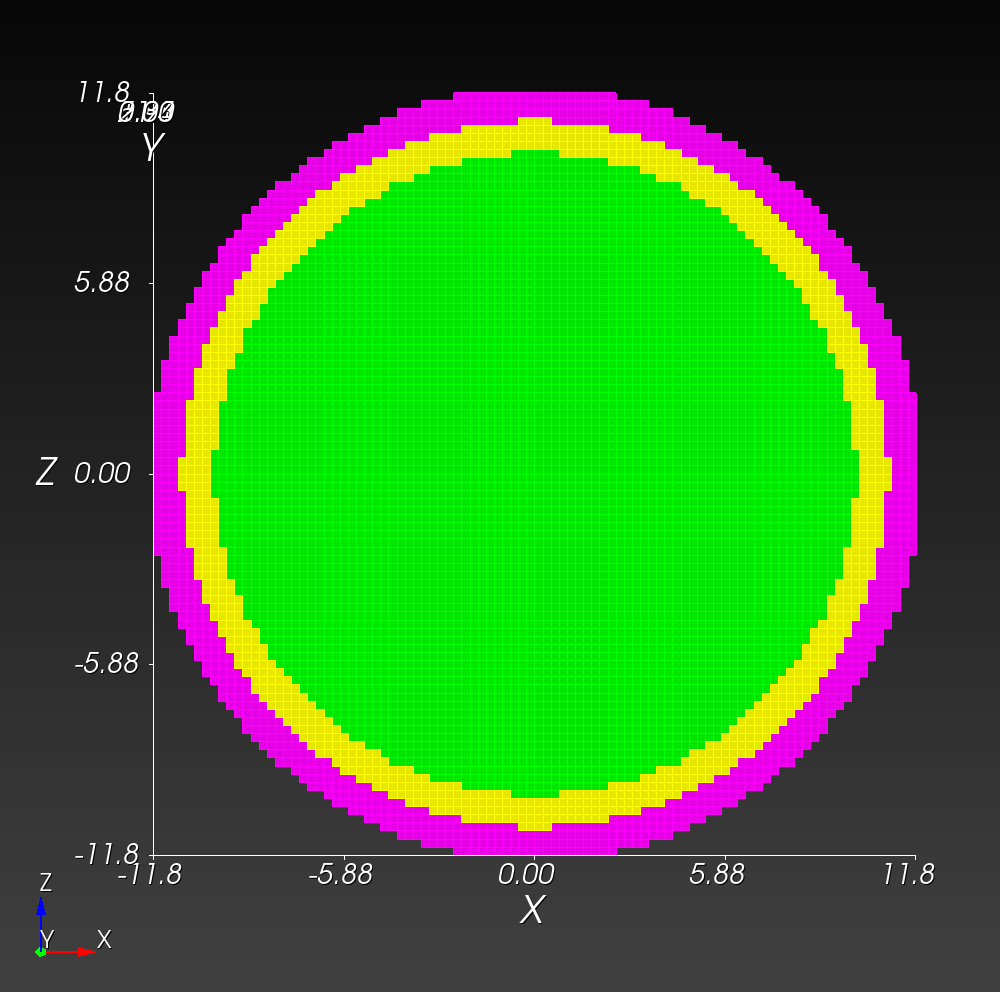 |  |
| isometric | 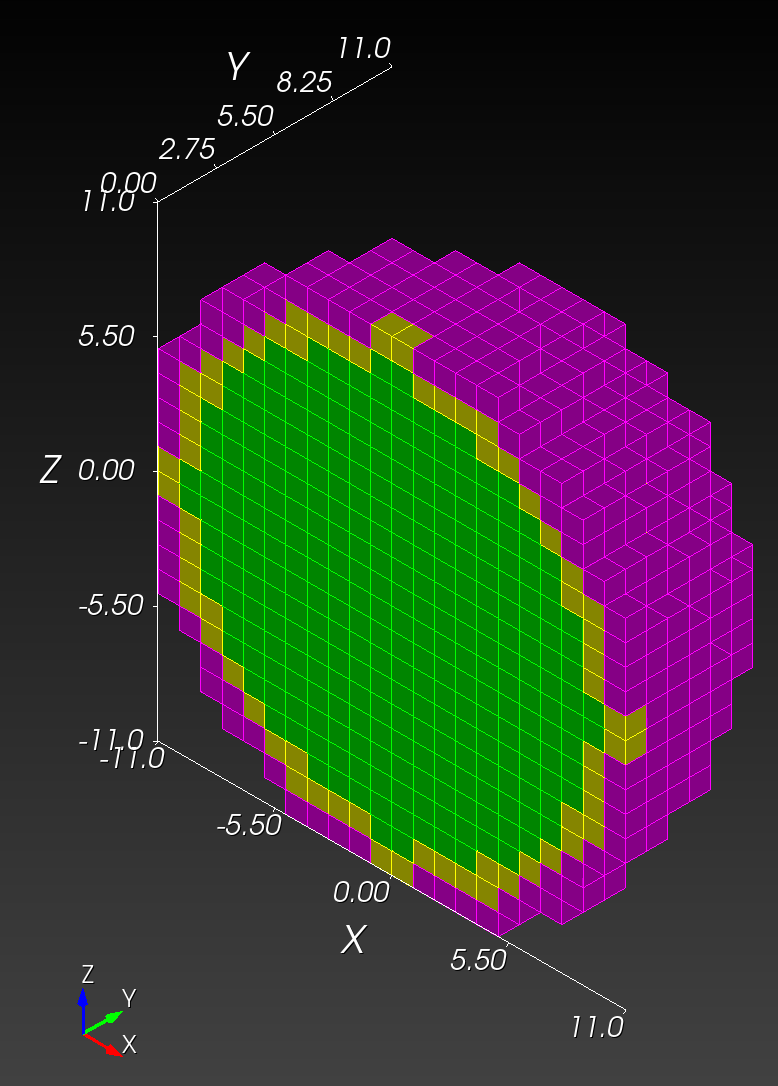 | 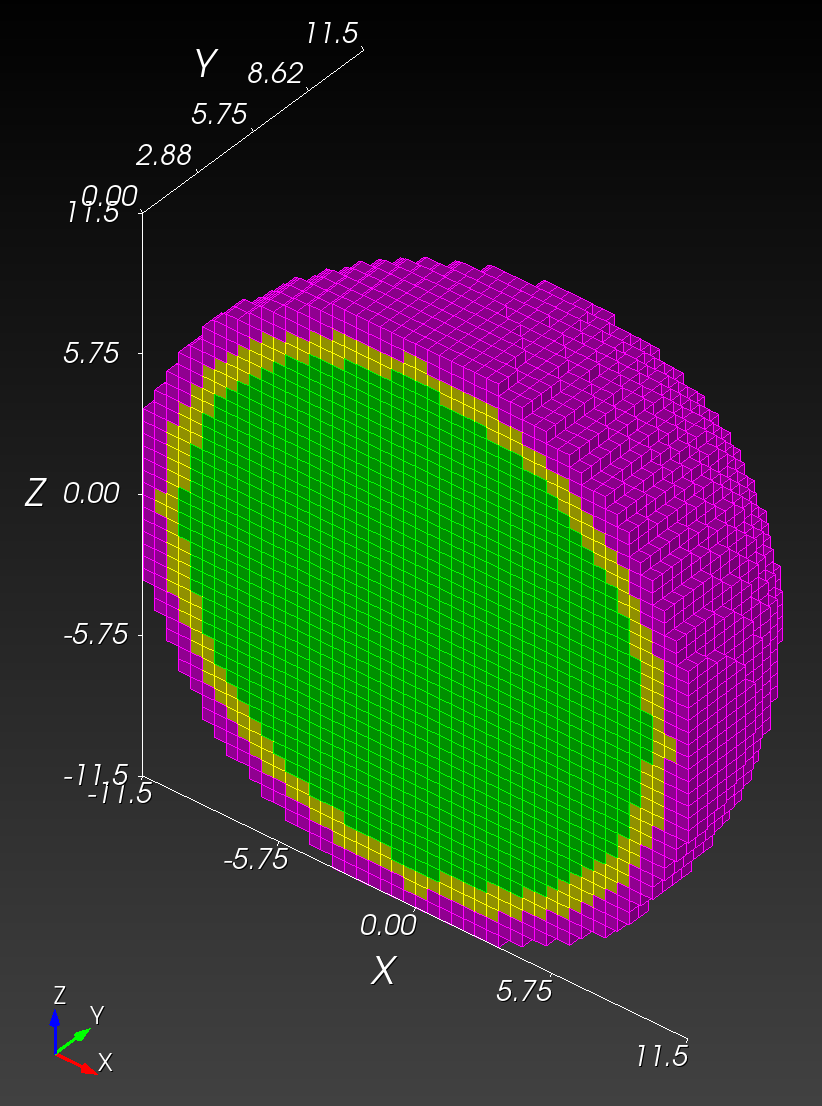 | 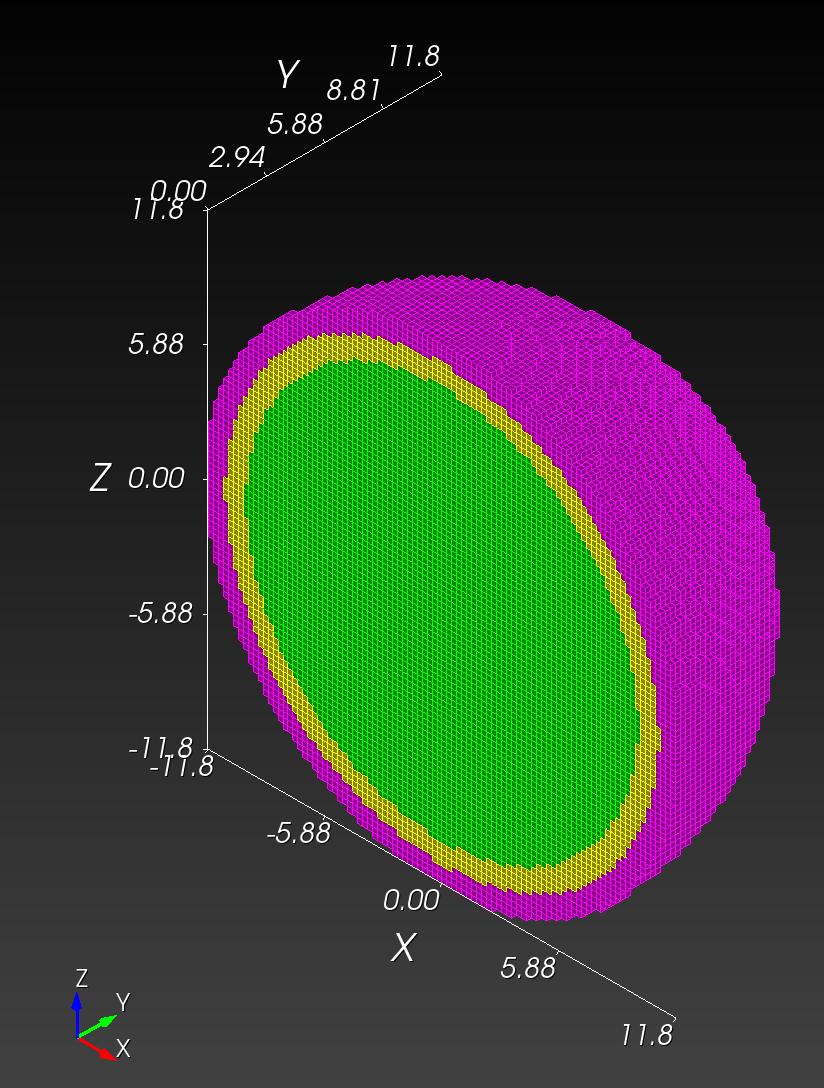 | 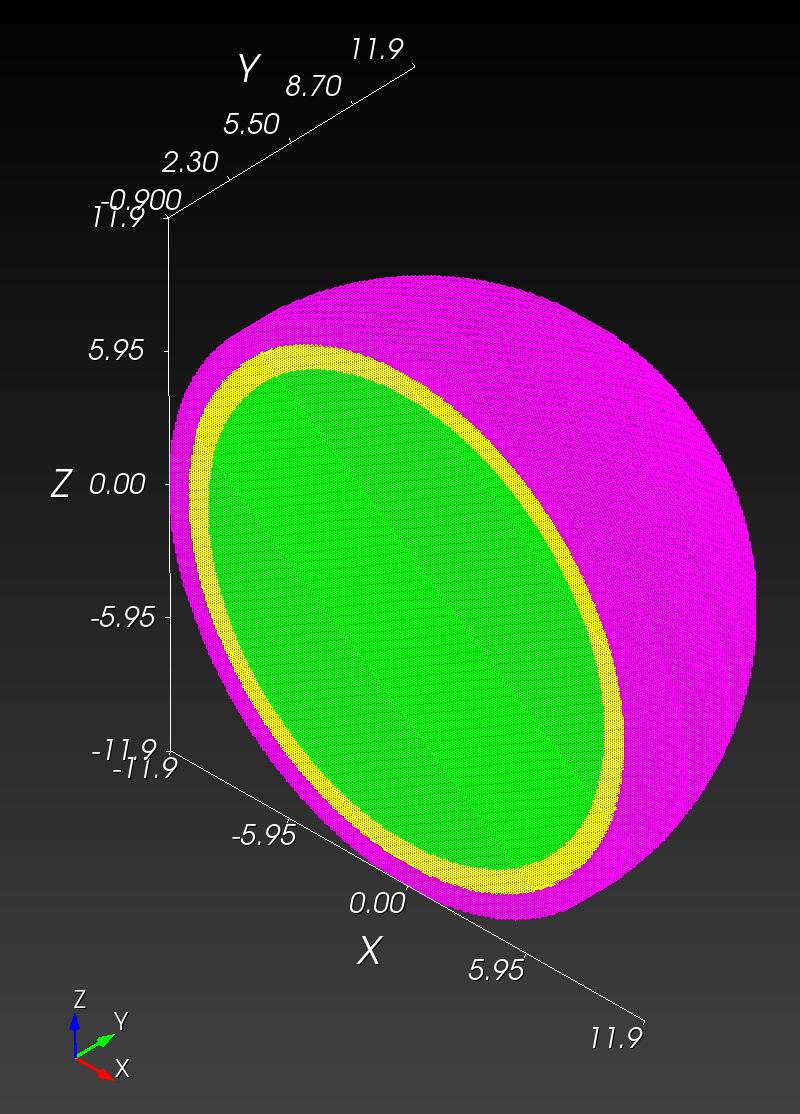 |
Figure: Finite element meshes at various resolutions, shown with half-symmetric cut plane, in front view and isometric view.
Table: Summary of vital results with automesh version 0.1.10 on macOS laptop.
| resolution (vox/cm) | processing time | .npy file size | .inp file size | .g file size |
|---|---|---|---|---|
| 1 | 11.839625ms | 14 kB | 0.962 MB | 0.557 MB |
| 2 | 89.120459ms | 111 kB | 8.5 MB | 4.5 MB |
| 4 | 662.89025ms | 885 kB | 73.6 MB | 36.8 MB |
| 10 | 10.01070525s | 13.8 MB | 1.23 GB | 577 MB |
Cubit is used for the visualizations with the following recipe:
reset
import abaqus  "/Users/chovey/autotwin/automesh/book/examples/spheres_cont/spheres_resolution_1.inp"

set exodus netcdf4 off
set large exodus file on
export mesh "/Users/chovey/autotwin/automesh/book/examples/spheres_cont/spheres_resolution_1.g"  overwrite

reset
import mesh "/Users/chovey/autotwin/automesh/book/examples/spheres_cont/spheres_resolution_1.g" lite

graphics scale off
graphics scale on

graphics clip off
view iso
graphics clip on plane location 0 -1.0 0 direction 0 1 0
view up 0 0 1
view from 100 -100 100

graphics clip manipulation off

view bottom
Comparison
Set up reference to the Sculpt binary,
alias sculpt='/Applications/Cubit-16.14/Cubit.app/Contents/MacOS/sculpt'
automesh convert -i spheres_resolution_1.npy -o spheres_resolution_1.spn
automesh convert -i spheres_resolution_2.npy -o spheres_resolution_2.spn
automesh convert -i spheres_resolution_3.npy -o spheres_resolution_3.spn
automesh convert -i spheres_resolution_4.npy -o spheres_resolution_4.spn
Run Sculpt
Test case with letter_f_3d.spn (renamed to test_f.spn for the test below):
sculpt --num_procs 1 --input_spn "test_f.spn" \
--nelx 4 --nely 5 --nelz 3 \
--spn_xyz_order 5 \
--stair 1
Elapsed Time 0.025113 sec. (0.000419 min.)
cd ~/autotwin/automesh/book/examples/spheres_cont/
sculpt --num_procs 1 --input_spn "spheres_resolution_1.spn" \
-x 24 -y 24 -z 24 \
--xtranslate -24 --ytranslate -24 --ztranslate -24 \
--spn_xyz_order 5 \
--stair 1
sculpt --num_procs 1 --input_spn "spheres_resolution_2.spn" \
-x 48 -y 48 -z 48 \
--xscale 0.5 --yscale 0.5 --zscale 0.5 \
--xtranslate -12 --ytranslate -12 --ztranslate -12
--spn_xyz_order 5
--stair 1
sculpt --num_procs 1 --input_spn "spheres_resolution_3.spn" \
-x 96 -y 96 -z 96
--xscale 0.25 --yscale 0.25 --zscale 0.25 \
--xtranslate -12 --ytranslate -12 --ztranslate -12 \
--spn_xyz_order 5 \
--stair 1
sculpt --num_procs 1 --input_spn "spheres_resolution_4.spn" \
-x 240 -y 240 -z 240 \
--xscale 0.1 --yscale 0.1 --zscale 0.1 \
--xtranslate -12 --ytranslate -12 --ztranslate -12 \
--spn_xyz_order 5 \
--stair 1
| test | nelx | lines | time automesh | time Sculpt | automesh speed up multiple |
|---|---|---|---|---|---|
| 1 | 24 | 13,824 | 11.839625ms | 1.101862s | 93x |
| 2 | 48 | 110,592 | 89.120459ms | 3.246166s | 36x |
| 3 | 96 | 884,736 | 662.89025ms | 24.414653s | 36x |
| 4 | 240 | 13,824,000 | 10.01070525s | 449.339395s | 44x |